# Client software quick start
# You will want to update Raspbian's package list before the install by running..
	$ sudo apt-get update
# Optionally you can also update all your installed packages with the following command:
	$ sudo apt-get dist-upgrade

# Download and installation quick start for newer versions of Raspbian Stretch:
# wget desired client software (make sure you are in /home/pi/ directory)
	$ wget http://www.allspectrum.com/mopower-hw2/mopower-ups-v0.94-build-07-07-2018.tar
# UNTAR FILE
	$ tar -xf mopower-ups-v0.94-build-07-07-2018.tar
# You will now have a mopower directory, cd to it and run the install program, reboot when asked..
	$ cd mopower
	$ sudo ./INSTALL-Raspbian.sh
# A manual install can be done by following instructions in INSTALL-Raspbian.txt
# This was tested on RASPBIAN STRETCH versions up to 2018-06-27, others may need
# modification per the requirements of your operating system.

# CURRENT SENSOR OPTION - Run the following to install the INA219 libraries.
	$ sudo apt-get -y install python-pip
	$ sudo pip install pi-ina219==1.1.0
		# NOTE the above command installs version 1.1.0 of the pi-ina219 libraries, version 1.2.0 currently has a problem with i2c bus numbers on the Pi
		# You can check your currently installed version by running "sudo pip show pi-ina219"

	$ sudo raspi-config
    		# under interface options enable I2C

# This was tested on RASPBIAN STRETCH version up to 2018-06-27, others may be similar
Older version of software can be found hereFirmware update instructions # Download firmware $ wget http://www.allspectrum.com/mopower-hw2/mopower-ups-hw2-firmware-v0.934-07-14-2018-001628.tar # Untar $ tar -xf mopower-ups-hw2-firmware-v0.934-07-14-2018-001628.tar # cd to directory $ cd mopower-firmware # kill UPS processes $ sudo pkill -f mopower-ups-wrapper.sh; sudo pkill -f mopower-ups.py # update firmware $ ./mopower-ups-firmware-update.py mopower-ups-hw2-v0.934-07-14-2018-001628.bin # reboot after firmware update is finished $ sudo rebootBack to Table of Contents
| Min | Typical | Max | |
| Input Voltage | 11 VDC | 30 VDC | |
| Battery Voltage | 6 VDC | 30 VDC | |
| Output Current 5v bus | 2.5A(1)(2) | 3.5A(1) | |
| DC-DC converter efficiency, 12VDC input, 1A output | 91% | ||
| DC-DC converter efficiency, 30VDC input, 1A output | 82% | ||
| Overall system efficiency 12VCD input | 88% | 91% | |
| Overall system efficiency 30VCD input | 81% | 85% | |
| Idle power usage, Pi Off | 0.27mA | ||
| Load regulation, 0-2.5A, DC converter before polyfuse | 2% |
| Device | Zero | Zero W/A+ | 2B/3B | 3B+ |
| mA/W | 100/0.5 | 120/0.6 | 230/1.15 | 400/2.0 |
| 9v Block NiMH (8.4v 200mAh, 1.68Wh) | 2h 44m | 2h 16m | 1h 11m(1) | 41 min(1) |
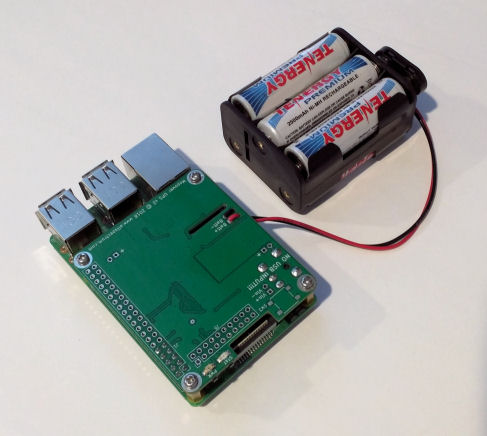
| 6xAA NiMH (2.5AH, 18Wh) | 24 hours+ | 20 hours+ | 10 hours+ | 6 hours+ |
| 8xAA NiMH (2.5AH, 24Wh) | 32 hours+ | 26 hours+ | 13 hours+ | 8 hours+ |
| 8xC NiMH (5AH, 48Wh) | 64 hours+ | 52 hours+ | 26 hours+ | 16 hours+ |
| 8xD NiMH (10AH, 96Wh) | 128 hours+ | 104 hours+ | 52 hours+ | 32 hours+ |
| Recommended Jumper Setting | Resistance | Voltage | Current | Power |
| Up to 15v | 255 ohms | 7.2v (6 cell NiMH) | 28mA | 203mW |
| Up to 15v | 255 ohms | 8.4v (7 cell NiMH) | 33mA | 277mW |
| Up to 15v | 255 ohms | 9.6v (8 cell NiMH) | 38mA | 361mW |
| Up to 15v | 255 ohms | 12v | 47mA | 565mW |
| 15-30v | 1020 ohms | 24v | 24mA | 565mW |

| COMMAND | DESCRIPTION |
| show all | Prints all common settings |
| show time | Prints all common time settings |
| show ups | Prints all common UPS settings |
| show data | Prints selected data variables w/CRC check |
| EEPROM RESET | Resets all common EEPROM variables |
| EEPROM SAVE | Saves all common settings to EEPROM |
| UPS-REBOOT | Reboots UPS |
The “show data” command is primarily for use by automated software to quickly retrieve the most commonly used data variables. The command returns the variables in a space delimited string followed by a CRC value. It is recommended that any automated software that reacts to output from the UPS to use this command and check the CRC value before acting on the output. The CRC value is in common XMODEM format and has a Polynomial of 0x1021
An example of returned data is below..
0.934 7 15 2018 13 2 13 1 258 1 1 0 0 1 14.71 7.85 6.85 0 0 0 0 300 20 0 52 43 62 239 1 1 49 0 0 0 0.000 93e1
In this case the CRC value is “93e1” and is computed on the entire string EXCEPT for the SPACE before the CRC value and the CRC value itself.
show data output description table for firmware version 0.934| Data | 0.934 | 7 | 15 | 2018 | 13 | 2 | 13 | 1 | 258 | 1 | 1 | 0 |
| Position | 1 | 2 | 3 | 4 | 5 | 6 | 7 | 8 | 9 | 10 | 11 | 12 |
| Description | FIRMWARE REV | MONTH | DAY | YEAR | HOUR | MIN | SEC | DAYOFWEEK | UPTIME_SEC | MAIN_POWER | UPS_POWER | POWER_COMMAND |
| Data | 0 | 1 | 14.71 | 7.85 | 6.85 |
| Position | 13 | 14 | 15 | 16 | 17 |
| Description | TIMED_SHUTDOWN | MAIN_POWER_REQUESTED | ADC_VIN_VOLTS | ADC_VBATT_VOLTS | ADC_VINVBATT_VOLTS_DIFF |
| Data | 0 | 0 | 0 | 0 | 300 | 20 | 0 | 52 | 43 | 62 | 239 | 1 | 1 | 49 |
| Position | 18 | 19 | 20 | 21 | 22 | 23 | 24 | 25 | 26 | 27 | 28 | 29 | 30 | 31 |
| Description | ADC_5 | ADC_6 | ADC_7 | ADC_8 | WATCHDOGTIMER | DDRB | DDRC | DDRD | PINB | PINC | PIND | SW2 | CHARGE_STATUS | UCTEMP |
| Data | 0 | 0 | 0 | 0.000 | 93e1 |
| Position | 32 | 33 | 34 | 35 | 36 |
| Description | DISCHARGE_TEST_RUNNING | DISCHARGE_TOT_MIN | DISCHARGE_TOT_SEC | DISCHARGE_TOT_CURRENT | CRC |
| Variable (*=read only) | DESCRIPTION |
| *MAIN_POWER | This shows the status of the main 5v power to the Pi. 1=ON, 0=OFF. Read only. |
| *UPS_POWER | UPS_POWER will be 1 when device has "GOOD" power, 0 when power has "FAILED". Primarily controlled by SETTINGS_UPS_POWER_FAIL_VOLTS, SETTINGS_UPS_BATT_SHUTDOWN_VOLTS, SETTINGS_UPS_BATT_POWERUP_VOLTS and SETTINGS_UPS_V_OR. Read only. |
| POWER_COMMAND | Communication and control of UPS power. 0=no command, 1=power up, 2=reboot, 3=shutdown. Normally used by control scripts only. |
| TIMED_SHUTDOWN | This is a countdown timer which is used to cut the 5v power applied to the Pi. Generally during a power off event. Normally used by control scripts only. |
| *MAIN_POWER_REQUESTED | Maintains user desired state of 5v power to the Pi. Note, this does not indicate the actual power state of the Pi, only the requested power state. Normally used by control scripts only. Read only. |
| *ADC_VIN_VOLTS | ADC calculated input voltage. Note: During power input loss and with certain low impedance power supplies OR if no input supply is connected this value may float to approx ADC_VBATT_VOLTS - 0.5v due to reverse diode leakage and high impedance of the ADC circuit. Read only. |
| *ADC_VBATT_VOLTS | ADC calculated battery voltage. Read only. |
| *ADC_VINVBATT_VOLTS_DIFF | Voltage difference between VIN and VBATT ADC inputs. Read only. |
| ADC_VIN_DIV | Divisor used for raw ADC to input voltage calculations. Should not normally be adjusted. |
| ADC_VBATT_DIV | Divisor used for raw ADC to battery voltage calculations. Should not normally be adjusted. |
| SETTINGS_UPS_POWER_FAIL_VOLTS | Input voltages less then the value specified will be considered a "FAILED" power input by the UPS logic. |
| SETTINGS_UPS_BATT_SHUTDOWN_VOLTS | Battery voltages less the the value specified by this variable AND an input power failure (as defined by SETTINGS_UPS_POWER_FAIL_VOLTS) will trigger a UPS power shutdown. This value should allow for enough remaining power in the batteries for a successful shutdown. |
| SETTINGS_UPS_BATT_POWERUP_VOLTS | Battery voltages greater then or equal to this variable AND good input power (as defined by SETTINGS_UPS_POWER_FAIL_VOLTS) will trigger a UPS power startup. This value should allow for enough remaining power in the batteries for a successful startup AND shutdown in case of erratic input power failures. |
| SETTINGS_UPS_V_OR | When set to 1 UPS power logic is changed to an OR configuration as used in the battery powerup/powerdown and input power failure variables above. Meaning either a valid battery voltage OR a valid input voltage will trigger power events. This is primarily enabled (set to 1) to allow battery only operation of the UPS. Normal use of the UPS should leave this setting at it's default value of 0. |
*CHARGE_STATUS=1
CHARGE_START_BVOLTS=32.000
CHARGE_STOP_BVOLTS=32.000
The example above shows the default state of these variables. The default setting is to always enable the battery charge circuit which is similar to the way revision 1 hardware functioned.
*DISCHARGE_TEST_RUNNING=0
DISCHARGE_TEST_START=0
DISCHARGE_STOP_BVOLTS=7.500
DISCHARGE_STOP_MINS=1440
DISCHARGE_TOT_MIN=0
*DISCHARGE_TOT_SEC=0
*DISCHARGE_TOT_CURRENT=0.000
DISCHARGE_RESISTOR_OHMS=1020
Start by verifying the DISCHARGE_RESISTOR_OHMS setting. It should be set to 255 for the "up to 15v" setting and 1020 for the "15v to 30v" setting, see above.
The UPS has a watchdog feature which can be used to reset your Raspberry Pi in case it is unresponsive. When enabled the watchdog timer will keep counting down and is reset by two events, one is any command received by the serial UART from the Pi and second is an actual RESET event caused by the watchdog timer itself. The watchdog considers any command, valid, invalid or blank (a RETURN), coming from the UART as a signal that the Pi is active and will reset its timer.
|
OPTION |
DESCRIPTION |
DEFAULT |
|
SETTINGS_WATCHDOGTIMER_ENABLE |
0=DISABLE, 1=ENABLE TIMER |
0=OFF |
|
SETTINGS_WATCHDOGTIMER |
This is the main watchdog “timer” in SECONDS. If it doesn't receive a valid signal from the Pi in this time, a hard reset is done. Range: 0-65,535 |
300 |
|
SETTINGS_WATCHDOGTIMER_OFFTIME |
Once a watchdog reset is triggered, this is the time to stay in the OFF state before reapplying power to the Pi Range: 0-65,535 |
10 |
|
*WATCHDOGTIMER |
*Read Only, This is the watchdog countdown |
NA |
|
*WATCHDOGTIMER_OFFTIME |
*Read Only, This is the watchdog countdown for power off time |
NA |
The UPS Input Control Settings allow a way to control the Pi (or the UPS I/O) depending on various inputs available to the UPS.
The following two controls are a good example of using the input control for a 12v automotive application. By selecting appropriate power up and shutdown voltages, we can make our Pi start and shut down depending on if our engine is running. This saves us from having to run an ignition wire to our Pi and also gives us more flexibility, for example we can set the TIME AT LEVEL option to allow the Pi to stay on for a predetermined time after engine shutdown.
Continuing our automotive example, here are two settings that will accomplish this.
Example, Turns on Pi when input voltage is greater then 13.50 volts for more then 3 seconds
INPUT_CONTROL[0]=2,1,1,13.50,3,1,0,1,1
Example, Turns off the Pi when input voltage is less then 12.80 volts for more then 10 seconds
INPUT_CONTROL[1]=3,3,1,12.80,10,0,0,0,1
See the UPS Input Control Settings table for more information. The voltage levels chosen should work for most 12v systems and can easily be adjusted. You may have noticed the last two options, Option 8 and 9 are set. Option 9 “USE TRIGGER” when set only triggers our control setting ONCE, it then needs to be reset by an external source to be triggered again. Our external source in this case ends up being the other command. The trigger options allow our automotive car computer to be turned on with the engine off, or turned off with the engine on. If these triggers were NOT set, once you turned off a Pi (via software or the power button) when the engine was running, the power on input control would immediately turn it back on again. In the opposite case when the engine was off, you would not be able to turn ON the Pi, since the power-off command would persist. This is generally not what is expected to happen in this example automotive application, hence the need for the trigger options.
In our example above, the power-off command resets the trigger of the power-on command and vice-versa. You can setup another control setting to act as a trigger reset as well, by setting COMMAND option to be 0 and the appropriate trigger option, you would only be resetting the trigger of the other command and not executing any power functions.
Table of UPS Input Control Settings
|
OPTION |
DESCRIPTION |
|
INPUT_CONTROL[0-9]= |
Number in BRACKETS specifies the Input control index, values 0-9 |
|
Option 1 – PRIORITY |
The Priority of this control, values 1-10.
A higher priority level will override other control settings
acting on the same command. |
|
Option 2 – COMMAND |
The Command to execute, 0=None 1=ON 2=REBOOT 3=SHUTDOWN |
|
Option 3 – PORT |
1=VIN, 2=VBATT.. see PORT OPTIONS table for further settings |
|
Option 4 – LEVEL |
Test level, float range 0-32.00 |
|
Option 5 – TIME AT LEVEL |
Consecutive Seconds where test level has to match. Range 0-65535. |
|
Option 6 – TEST |
0=Less then, 1=Greater then, 2=Equal to |
|
Option 7 – Trigger |
Holds trigger variable, 0=not triggered, 1=triggered |
|
Option 8 – RESET TRIGGER |
Index of other command to reset trigger of. Default is 99 which defines no action. |
|
Option 9 – USE TRIGGER |
Use (1) or don't use (0) our own trigger |
Table of PORT OPTIONS for Input Control
|
PORT OPTION |
DESCRIPTION |
|
1 |
Volts Input, float value |
|
2 |
Volts Battery, float value |
The UPS provides a way to wake up a powered off Raspberry Pi at intervals using the timer feature.
It is accessed using the “TIMER_CONTROL” variable. There are 10 individual timers available for use, they are accessed like a variable array. For example to set the first timer control option one can use..
TIMER_CONTROL[0]=5,1,30,24
This sets timer # 1
with a priority of 5
a command of 1 (which is the command to turn on the Pi),
The minute to run at, set to 30 minutes
Set to run at all HOURs (24 is the wildcard number that matches all HOURs)
With this setting the Pi will power up every hour at half passed the hour.
The options are comma separated and there should be no spaces, options should not be skipped.
10 indexes are available for use, numbered 0-9. Remember to issue a EEPROM SAVE command otherwise you will loose any set options if the UPS reboots.
Table of UPS Timer Control Settings
|
OPTION |
DESCRIPTION |
|
TIMER_CONTROL[0-9]= |
Number in BRACKETS specifies the Timer control index, 0-9 |
|
Option 1 – PRIORITY |
The Priority of this timer control, values 1-10. |
|
Option 2 – COMMAND |
The Command to execute |
|
Option 3 – MINUTE |
The minute to run the command, 0-59, 60 is wildcard 101-130 = step values, similar to Unix 'cron' For example 105 would equal to */5 in 'cron' and would run every 5 minutes, 130 would be equal to */30, etc.. |
|
Option 4 – HOUR |
The hour to run the command, 0-23, 24 is wildcard 101-112 = step values, similar to Unix 'cron' For example 102 would equal to */2 in 'cron' and would run every 2 hours, 108 would be equal to */8, etc.. |
The UPS is capable of making adjustments for Daylight Savings Time to its own internal clock.
While we believe most use cases would involve the Pi correcting both its own and UPS time, this feature is provided in case the Pi will be off for periods of time that may transition though a Daylight Savings Time adjustment event.
|
OPTION |
DESCRIPTION |
DEFAULT |
|
SETTINGS_DLS_ON |
Daylight Savings On or Off 1 = OFF, 1 = ON |
0 = OFF |
|
SETTINGS_DLS_STATUS |
Used to indicate if Daylight Saving Time is currently in effect (Summer time), or not in effect (Winter time). It must be set to the correct current value for Daylight Saving Time correction to operate properly. 0= DST 1 = NOT DST |
0 = NOT DAYLIGHT SAVINGS TIME |
|
SETTINGS_DLS_SPRING_HOUR |
Specifies the hour (in 24 hour mode) that Daylight Saving Time takes effect during the Spring and the clock is moved forward 1 hour Range: 0-23 |
2 = 2 AM |
|
SETTINGS_DLS_SPRING_DAY |
The day that Daylight
Savings Time takes effect. If SETTINGS_DLS_SPRING_WEEK
is set to 0, this option refers to the day of the month in which
the adjustment takes place. Range: 1-31 |
1 = SUNDAY |
|
SETTINGS_DLS_SPRING_WEEK |
Specifies the week in
which the adjustment is made. 0 and 5 are special cases. 0 is used
where we do not want to refer to a particular week, but to a
particular day of the month in which we want the adjustment made
(refer to SETTINGS_DLS_SPRING_DAY).
Range: 0-5 |
2 = SECOND WEEK |
|
SETTINGS_DLS_SPRING_MONTH |
Specifies the Month in which the Spring time adjustment is made. Range: 1-12 |
3=March |
|
SETTINGS_DLS_FALL_HOUR |
See above |
2 = 2AM |
|
SETTINGS_DLS_FALL_DAY |
See above |
1 = SUNDAY |
|
SETTINGS_DLS_FALL_WEEK |
See above |
1 = FIRST WEEK |
|
SETTINGS_DLS_FALL_MONTH |
See above |
11=NOVEMBER |
|
DAYOFWEEK |
Current day of the week. Required for proper operation of DST if the day option is used to specify a weekday. Range 1-7, 1 = SUNDAY |
5=Thursday
|
This setting allows one to 'software trim' the clock crystal responsible for keeping time on the UPS. Trimming of the watch crystal is generally not required if you have an accurate network time source available and you will be updating the UPS time accordingly. If you require accurate time keeping without a network connection or other time source you can trim this value if needed. Take accurate long term measurements of the UPS clock before changing the default value.
|
OPTION |
DESCRIPTION |
DEFAULT |
|
SETTINGS_TC_SEC |
Error correction to be applied to the clock crystal. Value must be a whole number and is calculated by using 604800 / (seconds per week correction). Unsigned 32-bit value |
235331, which corresponds to a value
of (-) 2.57 seconds per week of correction. |
|
SETTINGS_TC_SEC_POS |
Indicates if time correction value is positive or negative. 0=NEGATIVE 1=POSITIVE |
0 = NEGATIVE |
These options are rarely used and should not be normally adjusted. They are NOT reset by the normal EEPROM reset commands of the main firmware. It is recommended that you NOT program these options into any automated scripts and execute them sparingly.
Boot power on and brownout reset flags
On power up the micro-controller on the UPS will normally leave the 5v power to the Pi untouched EXCEPT when an initial power-on or brownout condition occurs. Remember that the UPS micro-controller will run with lower voltage then the 5v converter.. and hence will run at voltages that would not power up the 5v line to the Pi. When such a condition is detected the UPS *bootloader* will TURN OFF the 5v power and allow the main UPS program to decide if power should be turned on or off. This prevents the errant power up and then power down that would normally occur if we did not detect these two events. You may still see a very momentary blip of power on initial power up, this is a result of the very small bootup time of the micro-controller and has not been seen to cause any problems with the Pi.
Again this only occurs when initial power is applied to the UPS or when a brownout event occurs. It should also be noted that the micro-controller in use almost always detects both a power on and brownout AT THE SAME TIME, so setting one or the other in general will give you the same effect, see the micro-controller datasheet for further information.
These options are provided in case you need to turn off this functionality. Both options are ENABLED by default. Again, you will normally never need to adjust these values.
To disable power on reset flag check: BOOTPORFCHECK DISABLE
To enable power on reset flag check: BOOTPORFCHECK ENABLE
To check power on reset flag state: BOOTPORFCHECK STATUS
255 is ENABLED, 0 IS DISABLED
To disable brownout reset flag check: BOOTBORFCHECK DISABLE
To enable brownout on reset flag check: BOOTBORFCHECK ENABLE
To check brownout on reset flag state: BOOTBORFCHECK STATUS
255 is ENABLED, 0 IS DISABLED
Micro-controller Oscillator Calibration for UART speed adjustment
The micro-controller and Raspberry Pi both must keep an accurate clock source to properly communicate with each other via the serial UART. The speed of the UART that we use (19200) is slow enough where we can tolerate a fair bit of error. While there is always the option to automatically adjust the micro-controller oscillator, we have elected not to provide this auto-adjust feature. We have found in our testing that the factory calibration of the internal oscillator of the micro-controller to be very good, due to this experience we believe providing an auto adjustment feature would needlessly complicate things and add yet another troubleshooting step when problems do arise. There is also the UART clock source on the Raspberry Pi to consider, it is not clear as to the initial accuracy of this source, having an auto-adjust on our micro-controller might just make things worse.
With this in mind, we realize there may be cases where you would need to adjust the oscillator frequency. For example a very large temperature swing may cause clock problems, or we may have a combination of Raspberry Pi and UPS micro-controllers that are just too far out of alignment to initially communicate. Thus, we have provided a method to test and modify the main oscillator frequency of the micro-controller on the UPS.
This is another one of those options that are rarely used and should not be normally adjusted. They are NOT reset by the normal EEPROM reset commands of the main firmware.
*Note your UPS may have a different calibration other then default*
To display current oscillator calibration value: EEPROM_OSCCAL
To set oscillator calibration value: EEPROM_OSCCAL=VALUE
Value is 0 to 255 255 is our default setting meaning no adjustment is done!
Special command to print all oscillator calibration values. You can issue command “RUNALLOSCCAL” to run an oscillator test routine. This will loop the UPS through most of the oscillator calibration values (0-254, 255 IS DEFAULT NO ADJUST!) and echo that value on the screen. This is a good test to run to see what oscillator values will work, since if the value echos on our screen it was transferred successfully to the Pi via the UART. You will see garbage on your screen for values that are out of spec. We generally pick a value in the middle of oscillator values that print successfully on the screen. Note that there are TWO ranges in the adjustment range of 0-254, a low and high range. Please refer to the micro-controller data sheet for further information on the OSCCAL value.
NOTE that you can also adjust the clock speed of the UART on the Raspberry Pi side. If you cannot communicate with the UPS, you will have to use the UART adjustment on the Pi in order to communicate, initially set it up, or to adjust the oscillator calibration on the UPS. This may be needed in cases where either the Raspberry Pi clock and/or the UPS clock is too far out of adjustment.
You can do this by setting “bcm2708.uart_clock=3000000” in /boot/cmdline.txt and setting “init_uart_clock set=3000000” in /boot/config.txt
Adjusting init_uart_clock set in increments of 50000 should get you talking to the UPS. There are reports that some versions of the Raspberry Pi have trouble setting the uart clock or have different syntax to do so, the commands above have been tested to work with Raspbian Wheezy dated 2015-05-05. Check syntax on your version if you are running a different operating system.